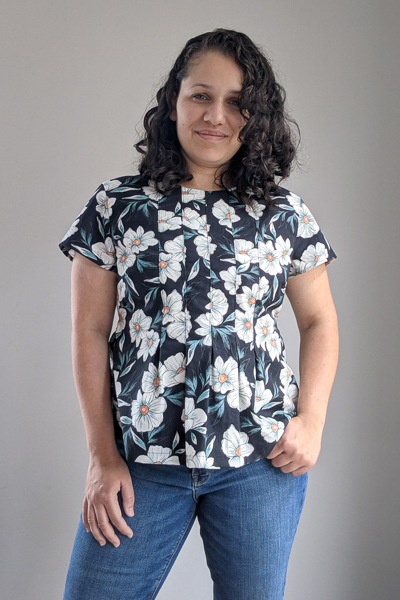
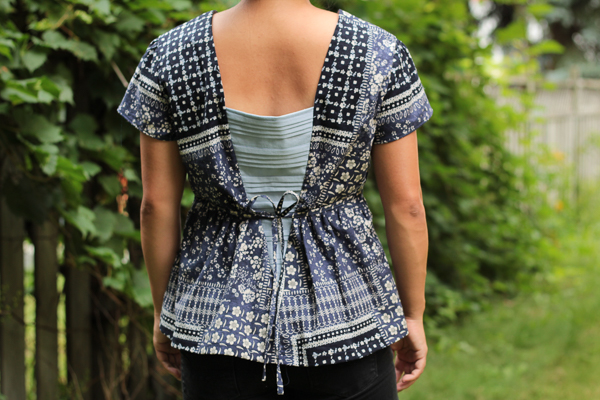
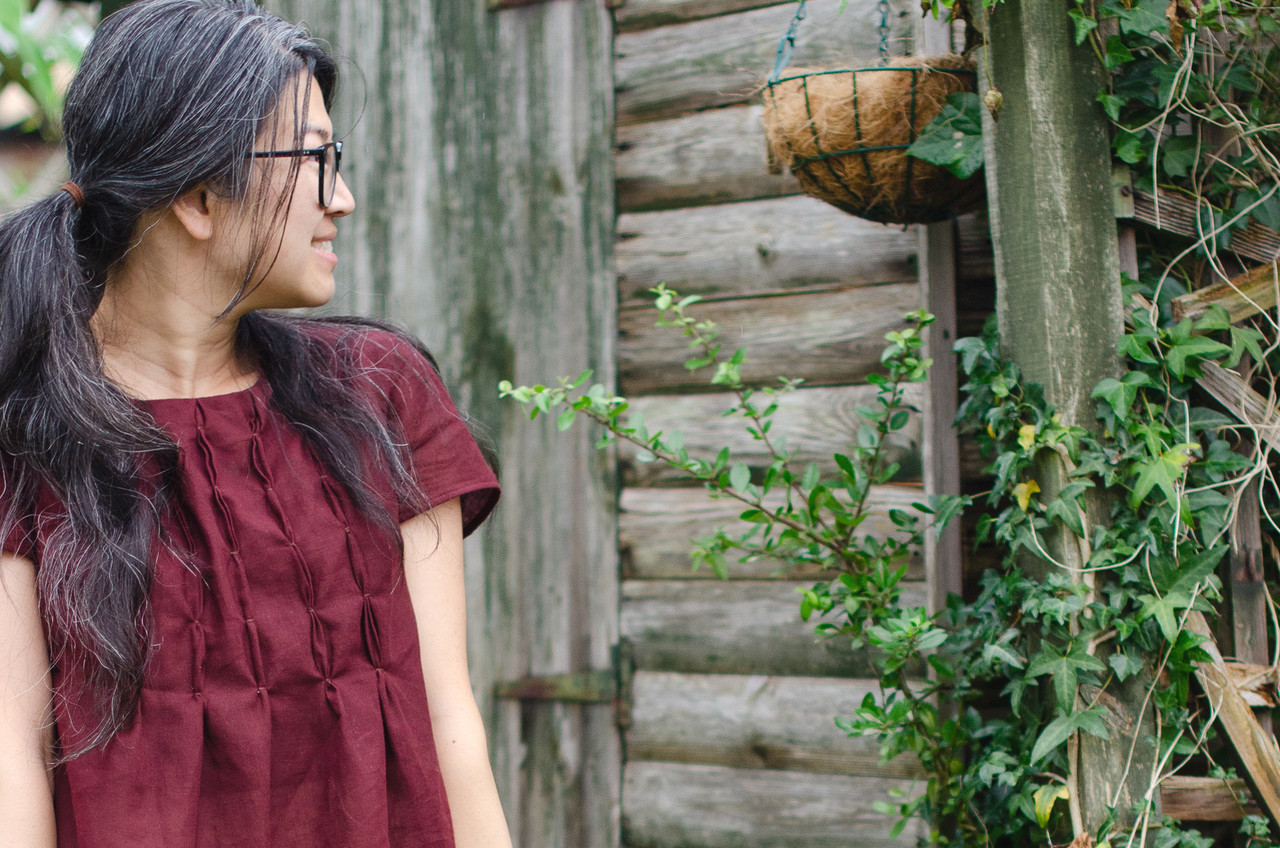
Why don't things go the way I want!? So many plans. So many wrenches thrown into said plans. But when it comes to releasing a pattern I need to feel confident and Miss Haze was not in that place when we released the girls' size Haze. Now we've gone through a few more changes and I can finally say I feel ready to pass this on to you.
For all the info on the girls' Haze please see the blog post A Woven Dress Called Haze. This post is geared specifically towards the Miss Haze and things that matter to the junior miss size range.
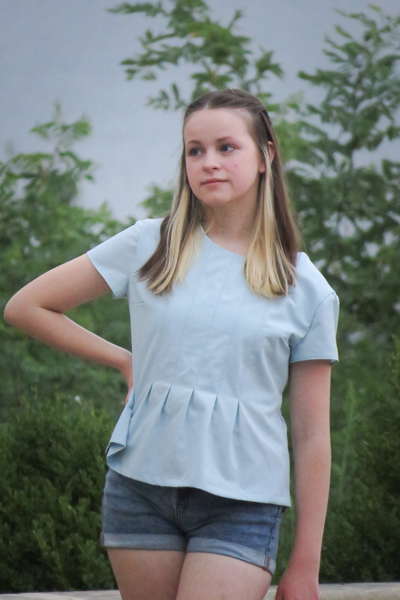
Here are the pattern details:
- Short Sleeves
- Peplum top with simple hem
- Knee length dress with simple hem OR pleated hem
- Waist ties
- Box pleats OR inverted box pleats OR bubble tucks on the bodice
- Plain back V section OR Narrow horizontal pleats
- Pockets (dress only)
- A, B, C, and D cup bodices

The fit for Miss Haze is only slightly more fitted in nature than the girls' Haze. There's some extra shaping for the waist, but it's still designed to be relaxed and a bit loose. It DOES still need to slip on over the head so we need some room for that. The ties are optional, however, you might choose them in order to add some more shaping at the waist.


You will hear many times "Always make a muslin first." and then you're probably like me and say "Yeah, right." Right? Well, I'll say that you are likely going to get a very wearable first Miss Haze, but note that almost everyone benefitted from a muslin before cutting into the good fabric. Woven garments are like that. Not the same universal fit that a lot of knit garments have. But if you insist on going straight into the good stuff, have a look at a few things that you might want to consider.
Fabric always plays a part into any garment. Miss Haze was designed for linen ever since I found out I love linen. There's a loose almost stretchy nature to linen that really works amazingly for this style, but of course you might have a different fabric that you want to use instead. Double gauze was used by a few and, as you might expect, it was necessary to size down a bit because of the extra loose nature of double gauze. Some more tightly woven fabrics that the testers called "just some old sheets" LOL were also used and a few found a bit of resistance when raising arms with these more rigid fabrics. So consider the way your fabric moves and if it might either restrict movement with it's rigidity or be too loosy-goosy.

The cross-back width is one main area to watch. Here a restricting fabric will be noticeable and those with a rounder or fuller back may need some adjustments to add some space into that area. On the other hand, a couple people found that the back V section seemed to gape a bit which could be indicating a smaller cross-back width OR in some cases it was a drapy fabric. (It seemed to be more evident when the V section was NOT pleated which is something to consider if this happens to you.) You want the wearer to have reasonable ease of movement expected for a woven garment, be able to get it on over the head, but also not get too loose on the back.
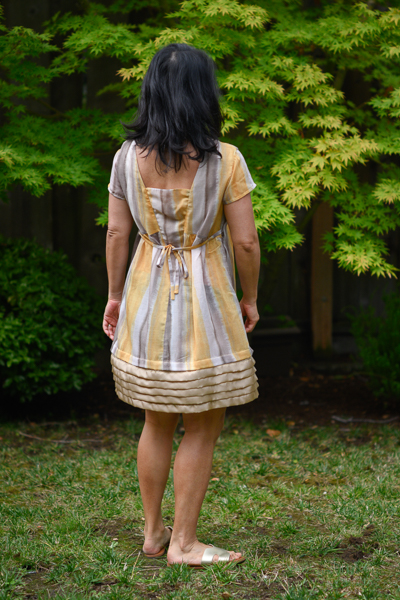
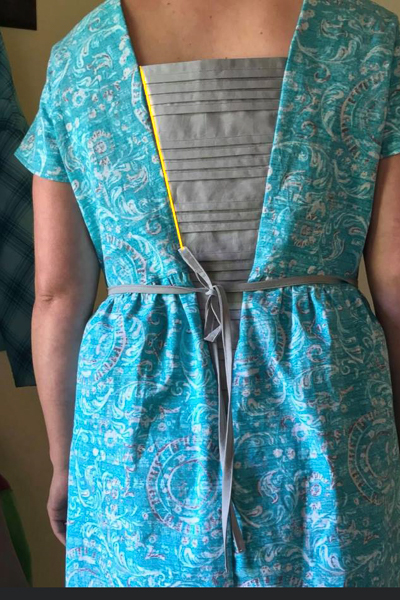
Adjusting a final garment for the cross back is a relatively simple process for any small changes. Turn the back bodice inside out and along the V section as indicated below with the yellow line, either sew a deeper seam allowance to remove some width or a smaller seam allowance to add some room. Just remember to gradually go back to the proper seam allowance at the top and bottom of that section. Try not to curve sharply when merging back to the regular seams.
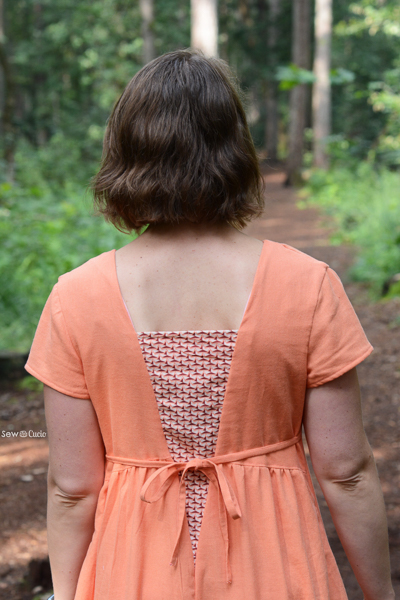
Sleeve and armscye - Trish and I both have upper arms that are bigger than our bust sizes and for this reason we are quite aware of the need for space in the sleeves so all our patterns are drafted with room. This seemed to work well for testers, however a few people played around with armscye depth to get the right feel for themselves and this seemed to be related to personal height. Some felt they preferred the armpit area to be raised a bit and others preferred it lower. It's when we have about the same amount of testers on both sides of the issue that we feel we are nicely in the middle and ready for people to adjust to their personal preferences. Thankfully we have lengthen/shorten lines through the armscye to help with adding or removing length in the bodice should you feel like the wearer's height is significantly different from the draft height of 5' 5".


The NUMBER ONE biggest thing during testing was all about the bodice side length. The reason that this is important for the Miss Haze is because it will determine where the bodice details end at the front waist and where the waist ties will be sewn in (for those choosing the ties). You really, really want this to be just above the smallest part of the waist. The tutorial includes instructions for how to take that measurement, but it was common for testers to still make some adjustments based on body shape. Some people will start to curve back out more gradually than others and for this reason each person needs to do a check and see what works for them. This is something that scared a few testers originally. I think it's fair to say that they were initially a bit alarmed at how awkward it was looking, but I can tell you this was an area that had surprising results with a minor change. Let me try to show you.
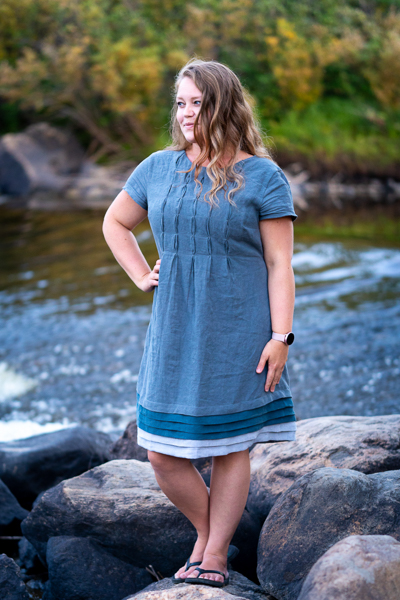
In the following pictures you see Trish's Haze dress with the bubble tucks all complete. While the bottom row of tucks is very close to her natural waist, there's something that just looks "long" in the front. Do you see it? In the picture it almost appears like a dropped waist dress. She was going to leave it because it was really just in certain positions that it didn't look right, but I wanted to see it with one less row.
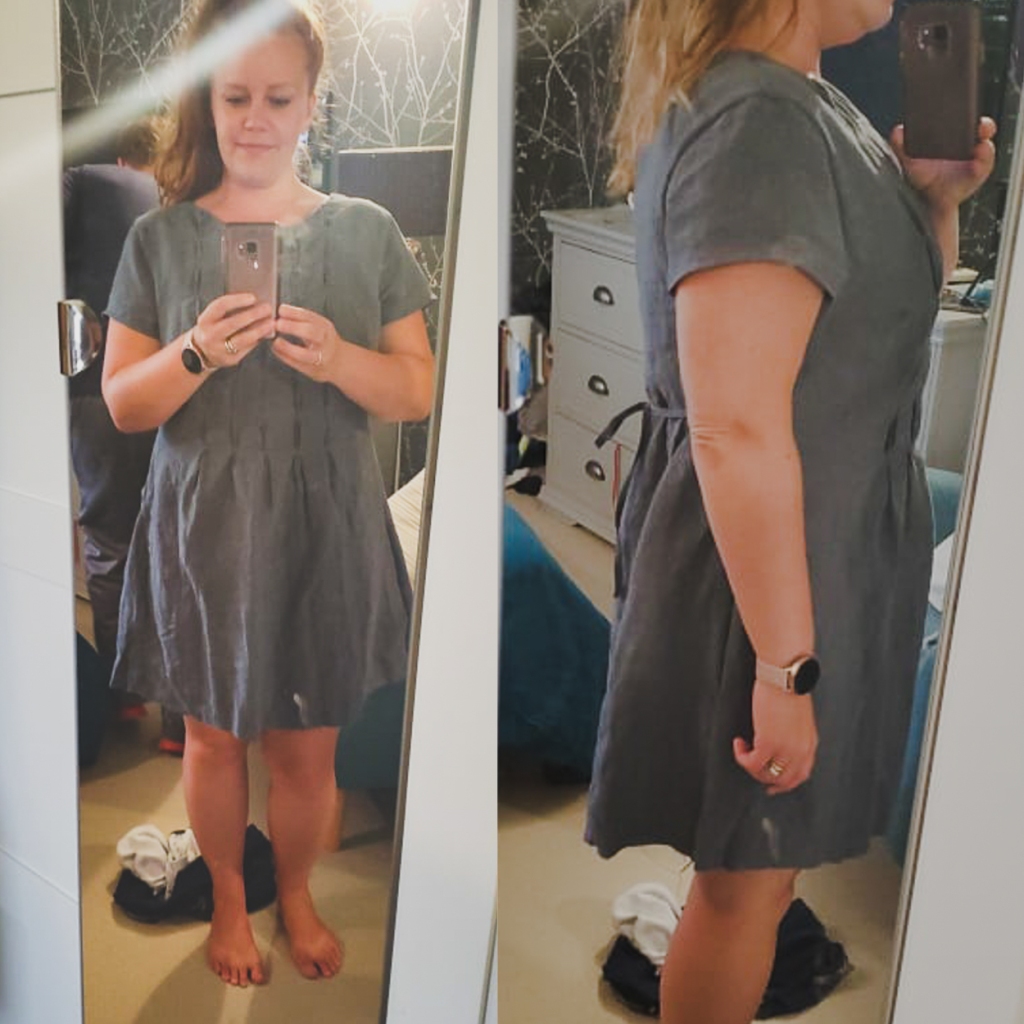
Look what happened when she removed the bottom row. I hope you can see the difference on here as much as we can in person. Immediately we noticed a much more flattering shape that just lifted her whole dress into a beautiful fit. And it was as easy as just removing that lowest row.
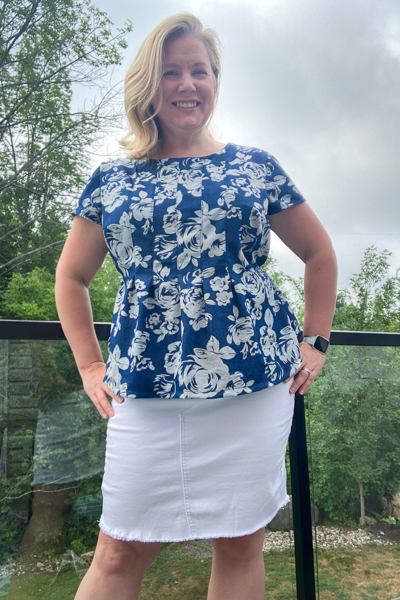
Here's another example. This time it's a pleated bodice. You can see the pleats come down to what looks very close to the natural waist, but they DO extend further below. Around the bust area there's extra fabric poofing out making it look too big across the chest. This was exaggerated by the waist ties that were also just that little bit too low. What's happening is the body is starting to curve outwards before the top starts widening and so the whole top is wanting to shift up to the smaller space, making it look like there's too much fabric across the chest.

For her "real" top, Jodie remeasured her bust and found that she needed a smaller size so some of the extra width was due to that. Added to that, she sewed the pleats a little shorter and her ties up a little higher and look at this! Beautiful! Isn't it great with the jean skirt?
So you can see that this is not a hard change to make on a finished garment. No need to pull apart a pile of seams. Just turn the Haze inside out and adjust the length of the pleats by either seam ripping a bit off of each column or sewing them a bit further. And for the bubble tucks, just remove a row or add another. The waist ties are the only thing that require a bit more seam ripping, but we're talking an inch or two at the side seam. It's worth it for the nice fit.
Since we're talking about the bodice section, as I posted in the previous Have blog post, we have a YouTube video to help you with those bubble tucks. I'll just slip that in here.

Finally, some people will ask about the best way to transfer the guides to the bodice for the pleats or tucks. The easiest method is a projector and a ruler, but that's not possible for all of us so here's a couple ways some testers did their transferring.
NOTE: The placement guides for junior miss are not completed guides as in the girls' Haze pattern. Due to 4 different cup sizes and the fact that many people will need to alter the length of the bodice for themselves, the placement guide IS set up for pleats, but for bubble tucks it is a start only and the tutorial includes instructions on how to create the bubble tuck placement grid to match the body it is made for.
First up was printing the placement guide and then cutting along the vertical lines. This is mostly for those doing the pleats and it allows you to fold each flap up so you can trace the pleat lines. For those doing bubble tucks, you can choose to do these lines first and then create your bubble tuck marks around the vertical lines right on your fabric.

Second option is for the bubble tucks only. Draw out your placement grid on the paper pattern and then poke holes through the paper at the end points of each tuck marking. Use a fabric marker or marking utensil and mark the dots onto the fabric. Save your template for future Miss Haze makes!

One tester used tailor tacks to mark the end points of her bubble tucks. I don't have a picture, but basically that means using needle and thread and tying small pieces of thread at each dot on the grid. Later you will use those ties as your guides and then remove them when finished.
Third option is tracing wheels and transfer paper. Again, I don't have a picture, but the process is placing some fabric tracing paper between the printed placement guide and the fabric and then running a tracing wheel along the lines which transfers the marks onto the fabric below.

I'm sure there are more options, but these will surely get you started.

I need to stop now. That's a lot of info and you want to get sewing, I'm sure! I will leave you with a few more beautiful tester makes and encourage you to share your finished Miss Haze tops or dresses with us on FB or IG using #sofimisshaze #sofionajuniormiss #sofionadesigns
Don't forget that you can get BOTH the Haze and Miss Haze in the bundle for a bigger savings and wider size range.
