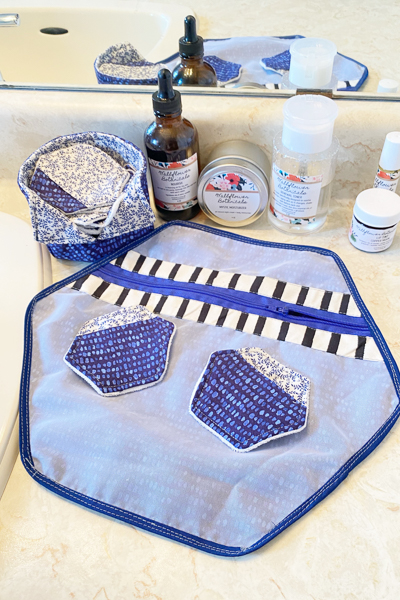
We don't often have (take) the time to work on extra projects. The time it takes just to work on the ideas in our heads is non-existent so we rarely feel like shifting focus. But as we are coming close to 10,000 members in our Sofiona Sewing Group on Facebook, we did feel like doing something special.
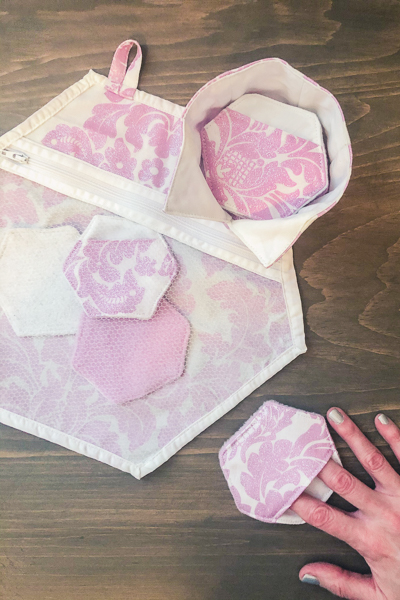
Now, we have quite a few special things planned for the next few months as we make our way to that milestone number, but the first is this cute little make-up cleanser set. In a society that is growing increasingly aware of our need and privilege to take care of the world around us, more people are looking for reusable products and the Cloudberry Collection is just that. It's a great use for scraps which already is an environment-friendly perk and it's replacing disposable towelettes that fill our garbage cans.

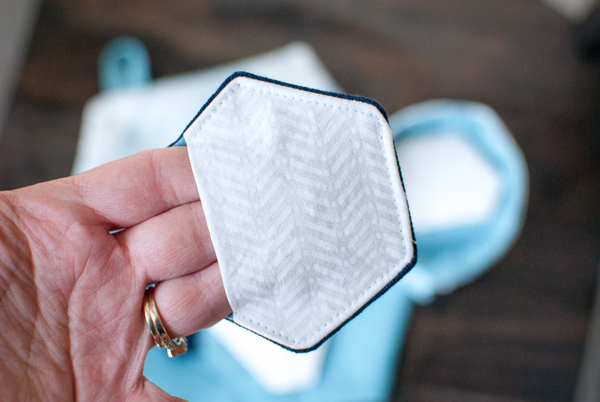
So what can I tell you about this set? Well, it started with the remover pads. We felt they needed to be hexagon shaped - just to be a bit different - and then we thought a little finger pocket on the front would be handy.
Fabrics for the cleansing part of the remover pad could be a few things. We used flannel and the "wrong" side of french terry for just a couple ideas. Something to consider with that fabric choice is absorbency. You don't want to just waste your cleansing liquid. Maybe test some of your scraps first and see what you like.

Then came a basket. Of course, it needed to be hexagon shaped to fit those cute little pads. The opening on the side can be just folded over and done. However, if you like, you could also add snaps or buttons to hold those flaps against the sides.


This basket has way more uses than just these pads though! Think about sewing clips or candies on your cutting table or cotton balls or or or..... Use your imagination and I'm sure you will come up with a few ways to use this basket.

Fabrics for the basket are typically quilting cottons. But I'd love to see one in denim or corduroy. Canvas would be good too.
The tutorial calls for fusible interfacing which will be applied to the main and the lining. Some testers considered using fusible fleece for more structure and found that it worked well, however, it should only be used on the main and keep the lining with regular interfacing or the whole thing will get too bulky. For the fusible fleece you will need to trim away 3/8" all around the pattern pieces before applying to the main to keep the seams manageable. And, of course, the more sturdy your fabric, the less you really need to worry about interfacing.

Finally, we thought a laundry bag would be the best addition. After all, we DO need to wash these things. And it would just be a shame NOT to make it a hexagon as well, right?

The laundry bag has a couple options. The first and primary use is, well, a laundry bag and in this case you'll need a mesh or similar fabric that will let the soap in when you throw it in the wash. But why let that be the only use for this cute bag!? How about a bag for the Wildberry Bras and other "unmentionables" when going for a weekend trip? Or throw it in the diaper bag with some baby toys. I'm sure with the right fabric, this could also be great for wet swimsuits after swimming lessons.

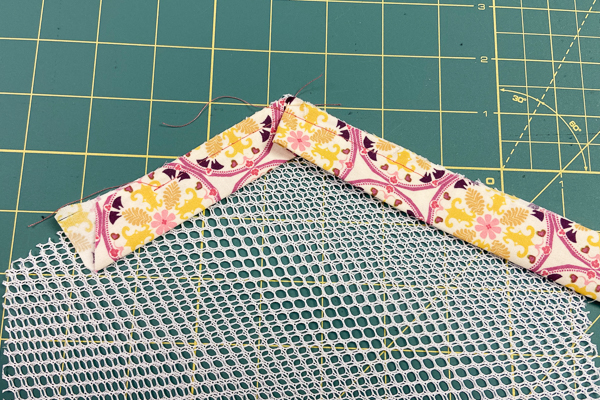
When using fabrics (non-mesh fabrics), the simplest way to finish the edges of this bag is to place right sides together and sew around. But when using mesh, it's best to bind the edges. The tutorial suggests a double fold bias tape type method, but one tester found this following method easier for super slinky, tricky to use mesh:

Cut the binding fabric 2 1/4" wide and press it WST all the way down matching the long raw edges.

Place it on the back of the bag with all the raw edges aligned and follow the instructions in the tutorial for getting around the corners.

Fold the binding up and over the seam allowance and secure. Topstitch all the way around about 1/8" from the inside edge. It's a bit thicker than the tutorial method, but still very clean and neat and you know we like that.


Something that is very likely to be a concern from some people is having a zipper that is too short. Here's a simple way to add some length to your zipper before installing it in the bag.

Cut a strip of fabric the same width as the zipper tape and a few inches long. Lay it right sides together to the zipper and sew across the tape just below the stop at the end of the zipper.
Fold the fabric back exposing the right side of the fabric and topstitch across the zipper just inside the fold to secure.
Continue with the instructions.

You see just a small peek of the fabric at the end of the zipper and it doesn't take away from the look of the bag at all.
And I believe that is all I have for you today! Remember, this special little set is available on the Sofiona Designs website BUT it's also available FREE for all Sofiona newsletter subscribers. Follow this link to sign up.


