
I love holiday dresses. There's just something exciting about making something fancy and perhaps a little over the top...even if it's not totally practical. For a couple years now I've wanted to design a dress that would work for everyday, but also have the look and feel of something that could be "glammed up". Since I specifically had Christmas in mind at the time, I knew I wanted to call it "Cranberry". Basically this dress had a name at least a year before I even knew what it would look like!
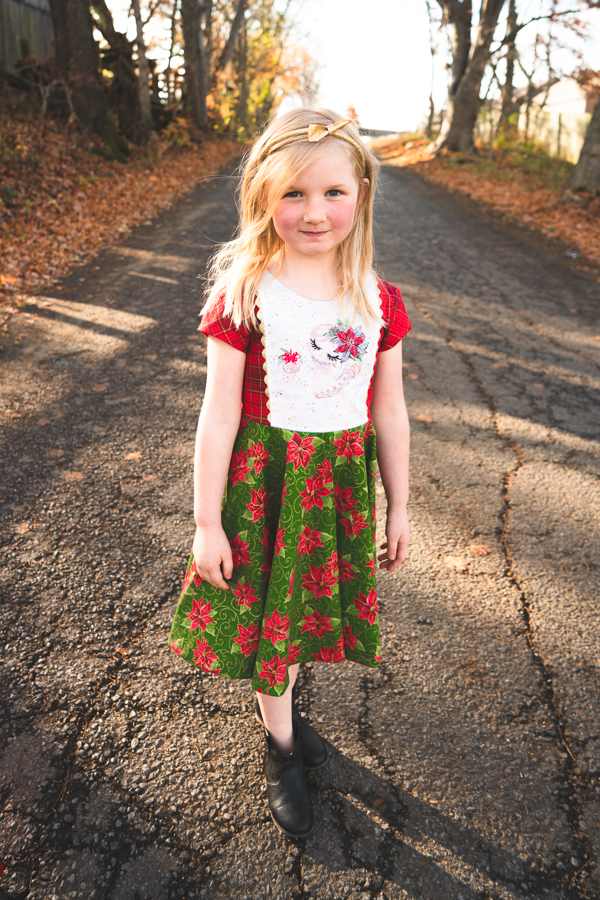
So what DOES the Cranberry dress actually look like? The front was left pretty basic. I love the idea of using this space to add some lace or embroidery. Or even create your own piecing and add a center panel like Katie did! (Don't forget to add seam allowances to any edges where you've cut the bodice apart to create new pieces.)

Right: Morgan blew us away with her embroidered lower back panels.
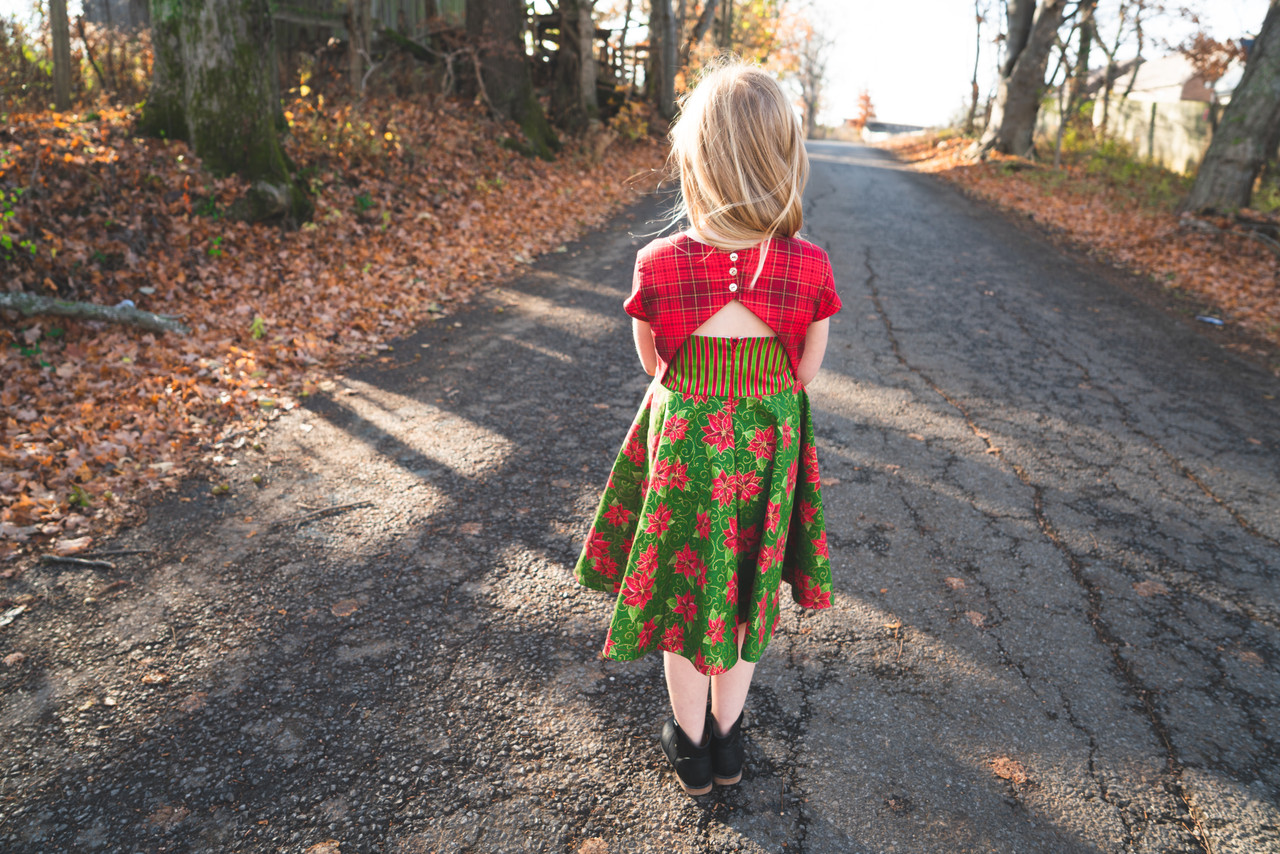
We at Sofiona Designs love a fun back and so that's where the more exciting features on this dress are. Upper bodice pieces overlap the lower bodice and meet at the center to be closed in one of three ways. Option 1: Using bridal button loop elastic/tape and delicate buttons (such an elegant detail, without needing to cover a huge section in these tiny buttons).

Option 2: Button loops made with fabric and closing over 1/2" buttons. A great option if you can't get your hands on the button loop elastic, or don't want to deal with quite as many buttons.

Right: Rebekah
Option 3: Using buttonholes and larger buttons. This option requires a different cut line than the first 2 (noted on the pattern pieces), and is a great opportunity for some fun feature buttons. The smaller sizes use 3 x 5/8" buttons, while the larger sizes use 2 x 1" buttons.

Bottom (Left to Right): Deanna and Jess
You could even do a hack like Mary Beth and use snaps for that upper back. Make sure to cut your pieces using the 'buttonhole' cut line, then transfer the button placement dots to BOTH back pieces and use those markings to place your snaps.

The lower bodice closes with an invisible zipper, creating a clean smooth line down center back. We noticed during our own fitting stage that the top of this back panel kept getting a wave in it once the zipper was installed. The (hidden) top of the zipper tape was pushing against it from the inside and creating this ripple. After looking through a number of other store bought skirts we realized that the little hook and eye that most had at the top of the zipper was not JUST there to keep the top edge closed. It actually also functioned to help pull the seamlines back into shape. While this dress will work just fine without them, we highly recommend including the hook and eye detail for a cleaner look and finish!

This pattern calls for a 9" or 11" invisible zipper, depending on which size you're making. We know you may not always have those exact sizes available or on hand but the nice thing about invisible zippers is that it's pretty easy to shorten a longer one. Hand stitch a new bottom zipper stop 9" (or 11") from the top of the zipper by sewing around the zipper teeth a number of times with a piece of thread. About an inch below that cut away any extra zipper tape.

Sleeves! We made a dress with sleeves! (It IS winter after all.) Three different lengths include long, elbow and short/cap.


Right: Meagan
Right: Zoe
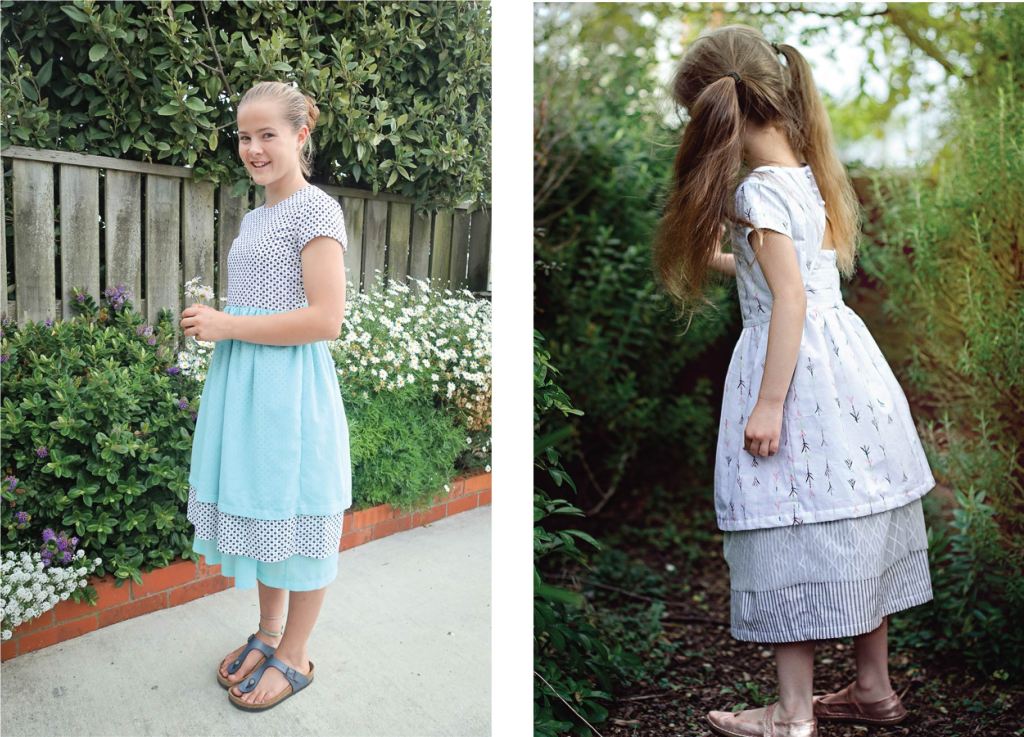
The skirt also has a variety of options. Choose circle or gathered skirt and layer them in 1 to 3 tiers (short, knee and tea length). The cut chart for the gathered skirt will give you a light gather without having to use up excessive amounts of fabric. For a fuller look consider doubling the width of the pieces. Keep in mind that if you're making multiple tiers this WILL add to the bulk of the waistline. Serging or zig-zagging over the SA becomes even more necessary to help contain/compress the bulk.


Included in the recommended fabrics are things like chiffons and rayons. If you choose to use these fabrics it's good to go into it prepared to deal with their "shiftier" natures. One place their tendency to shift and drape will become an issue is if you choose to make the circle skirt. Because at least half of the circle will be cut on the bias you will likely notice these sections stretch out and drape differently than the rest of the skirt. The solution is to hang the dress/skirt for a few hours (or overnight) and allow the fabric to fall as it wants to. Then go in and trim the lengthened sections back to level with the rest of the skirt. At that point you can hem as per the instructions.

Notice the sections where the chiffon layer has stretched/draped down longer than the rest of the skirt? Once hung overnight these sections became more obvious and it was possible to trim the skirt to be level again before hemming.
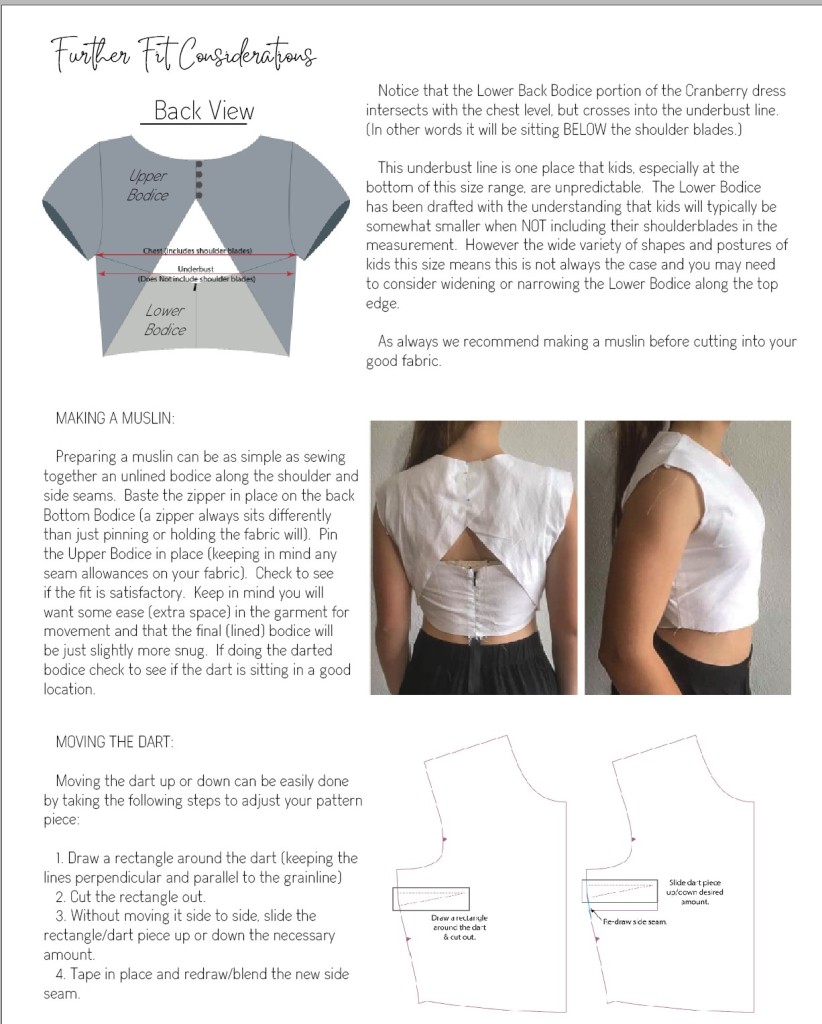
How to choose a size. This is a section we include in all our pattern tutorials. The basics are the same for most of them (ie - how to take a chest/waist measurement, blend between sizes when necessary, etc.) but some patterns require a little extra consideration. Cranberry is one of them. The style of this garment is fitted and because of that accuracy is SUPER important when taking your child's measurements. When taking chest measurements be sure to include the shoulder blades if possible (some kids shoulder blades sit too high on the back for it to be possible or necessary to include them). When halfway between sizes, be sure to size up. The 2 part back bodice (upper section and lower section) also require some further consideration. The following is a picture of a page we've included in the tutorial that talks about fit and how to quickly do a muslin check.
We always hope you'll share your makes with us in the Sofiona Designs Fan Group or on IG so we can enjoy them too. (I'm especially curious to see what you might to do dress this one up!)

Left to Right: Sherri, Morgan and Trish (x2)
#soficranberry #sofionadesigns #cranberryinthewild