Oh man, it's been such a great break since the holidays!! I've been happily avoiding certain self-inflicted "responsibilities" which involve social media and more and more I dream of a life where we don't need that stuff, you know what I mean? But before I turn this into a deeply emotional post about my thoughts on life in 2022.... I DID also draft a new pattern!!! Well, it's kinda like I drafted 3 patterns and put it in one.

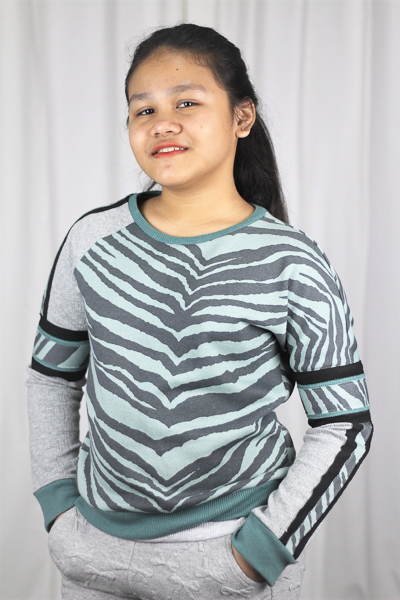
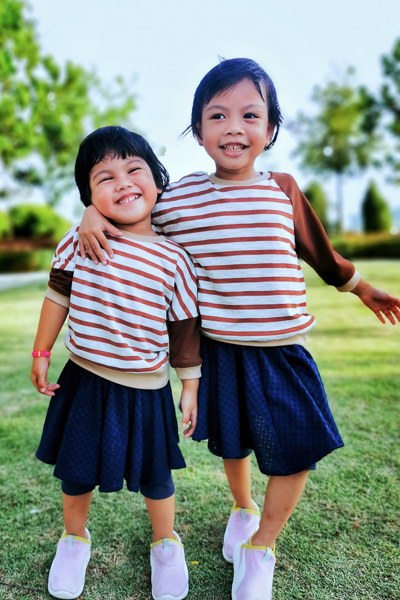
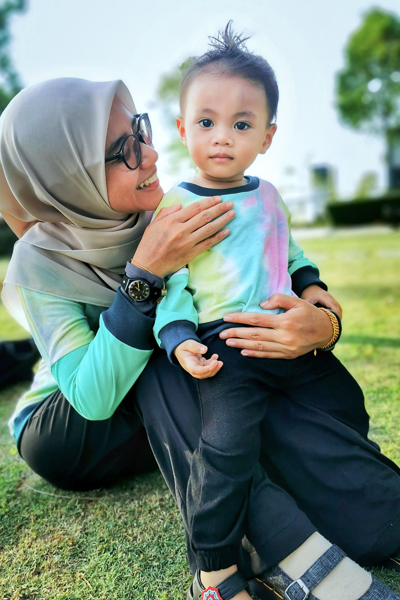
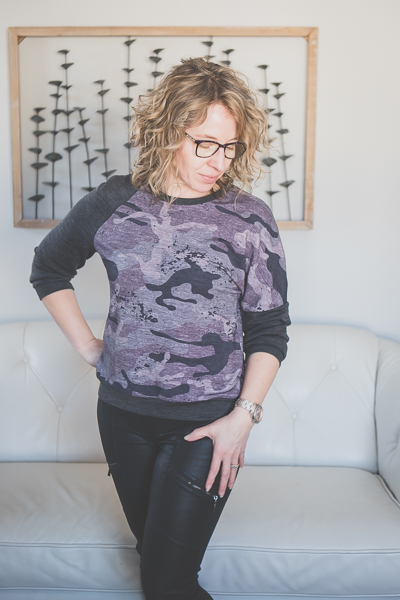
The Heron or Miss Heron is another super simple and remarkably quick make. People might need to start reconsidering labelling Sofiona as only "complicated" makes. LOL Just kidding. We don't get "accused" of that, but people do notice that we have more patterns that involve time and a clear focus so it's always nice to have these easy patterns as well.
Besides being quick and easy, Heron is pretty much 3 patterns in one so it's super versatile. With the dual sleeve option you can use the patterns to create a raglan top, a dolman top, or a combo top with one of each sleeve. It makes this pattern go a LONG way and we like that, right!?

Let's look at the options. (These are the same for both size charts, but I'll comment on slight differences afterwards.)
- raglan bodice (darted shoulder on Miss version only)
- dolman bodice
- combo bodice
- long sleeve (meant to come over the bottom third of the hand)
- mid-length sleeve (meant to be pushed up the arm for a slouchy look)
- crewneck
- cuffed hem at high hip

SLEEVES - Pretty much all the chat about this pattern is sleeve related. This is where we find the most variance between different people and there's a slight difference in the expectation for the girls' Heron as opposed to the Miss Heron. I'm going to start with the draft intent and then talk about what to expect is different for girls' Heron.
The draft design for the long sleeve was very intentional. In the past all of our sweater patterns have included a fairly fitted cuff around the wrist and I know some people like a loose cuff. So the Heron cuff on the long sleeve is meant to gently fit around the bottom 1/3 of the hand where it starts to widen. The cuff should touch the hand all the way around and not hang too wide. The overall sleeve length is a bit longer than the Clover, for example, so it can nicely reach that longer intended length.

The length for the mid-length or 3/4 length sleeve is also intentional and is meant to be pushed up just below the elbow for a relaxed, slouchy sleeve without quite the amount of fabric gathered that you would get from pushing up a full length sleeve. For this length it becomes more important that you check the fit and recovery of your cuffing fabric to make sure it will fit and hold nicely around the arm. You probably won't want it just hanging down because that length is a bit visually awkward. But that will also depend on the person who is wearing it and their arm length.
A few testers were taken off guard when they saw the cuff pattern pieces. Typically we expect a cuff around the wrist to be smaller than the lower arm which is a wider part of the arm, but now that you know the draft intention, I'm sure it makes sense.
Of COURSE, you must be aware of personal body differences. We had testers that needed to still add length to the sleeves and some that needed to remove length. In the end, we found the happy medium, but please consider this when cutting.

DIFFERENCE ON THE LITTLES - Now, when it comes to the littlest kids, my guess is that the draft intention of the long sleeves becomes a problem. I'm picturing sleeve cuffs covered in mac and cheese and cereal, am I wrong? So I did remove some sleeve length on the sizes 2-3-4 with that in mind.
For the mid-length sleeve, we don't expect the littlest kids to make sure they are fashionably pushing their sleeves up into position. This became the most difficult for me to balance because we notice that arm lengths seem to vary a LOT on kids which meant that it was tricky to find a really solid spot for those lines. Whenever possible, do a fit check before adding cuffs to see if you need to remove any length.
For both sleeve lengths I erred on the side of a bit longer because at the very least it lasts longer in their closets and I think most of us can appreciate that.

RAGLAN DART - On the Miss Heron the biggest draft difference is the raglan shoulder dart. The girls' Heron does NOT have one, but I decided to go ahead with one on the Miss version for the sake of those that need to make more adjustments for broad shoulders and such. Sewing a dart on knit fabrics is not a completely foreign concept, but it's definitely not done quite as often so this is something that might cause some nervousness.
Heres's some things to consider:
- You should be prepared to sew the dart carefully and make sure that the end point of the dart is curved gently as in the instructions.
- You don't want your seam to end at an angle from the folded edge. The more pronounced the angle - the bigger chance you'll have a strange point on your shoulder later.
- Consider drawing your seam line before sewing so you can create a smooth line to follow
- Don't use your serger to create the dart. It's not fun to have to fix later. Rather finish the raw edges once you know the dart is sitting nicely.
- Don't be alarmed if you look at the final garment and see that you need to make adjustments to the end point. Certain fabrics are a bit more particular and just need another attempt on that curve. Put the shirt on inside out and carefully pin the extra fabric out that was causing a point and then sew that in. No seam ripping necessary!

The last sleeve comment is that we have a hack to share with you. We considered adding a short sleeve cut line to the pattern, but in the end I made the decision not to. It's a simple enough hack if you want to try it for yourself, but it didn't quite match the vision I had so we'll save short sleeves for another shirt another day. I will share with you a few tester versions so you have an idea on what it looks like. They really do look cute. I'll add my own attempt which was ultimately my deciding factor to NOT add the short sleeve option. It was not so cute.

When calculating the cuffs for the sleeves, I recommend using 95% of the opening as these testers have. Seams tend to stretch out a bit when adding cuffs and this slight bit of negative ease helps to counter that so you don't get a cuff that looks stretched out.
Now for a look at how it could go bad. The ease on the shirt did not match the ease on the sleeve once I added a band. Now, my arms are typically bigger than my bodice size so I know this about me and this is not really surprising, but I still don't very often make my sleeves much bigger. I'm just aware that they will fit me differently on my bicep. For this, though, this is unacceptable to ME. LOL Just consider this if you are wanting to make short sleeves.

For extra reference, this cuff was made with 95% ease and my bicep is about 1" smaller than the finished bicep measurement for my bodice size. The fabric is also french terry so it's quite structured and definitely does not have drape. I do believe fabric type played a large part of this looking tighter on the arm then it would in another fabric.
Let's go back to some good ones...


Top Length - One final note on the overall length. This pattern is drafted to end at high hip in both size ranges. A few testers found that this was a bit short. It was mostly due to long torsos, but some just preferred a longer length. Take a close look at tester pics to decide if you want to add length. Especially if you know you're sewing for a long torso.
I think that's it! Here's some more final pics to enjoy. Oh! And remember that both size ranges are available in the Heron Bundle for a bit of a saving.
Use #sofionadesigns #sofiheron #sofionajuniormiss #heroninthewild on IG and tag us @sofionadesigns. Also find us on FB in our Sofiona Sewing Group where we love to see your makes.
What are you waiting for??


