
Every pattern has its story. Its way of making my heart race... in the form of stress. Then later it races again while I fall in love with the end result. Clover has been in the making for months. I am such a slow designer. Then World Crazy hit our part of the world pretty much the same day I put out the tester call. The emotions and the unknowns led me to cancel the test. I just didn't think it was the time. But a week or so later, I changed my mind. I'm allowed. I re-opened the tester call and it turns out that maybe that little gap was what a lot of us needed. This time we were ready and raring to go!!
The details:
- labelled as intermediate when choosing all options
- crop or waist length
- short, mid or long sleeve
- neckband OR
- hood - lined or bound seams
- optional bodice lining (views A and B only)
- optional sleeve pocket with a zipper
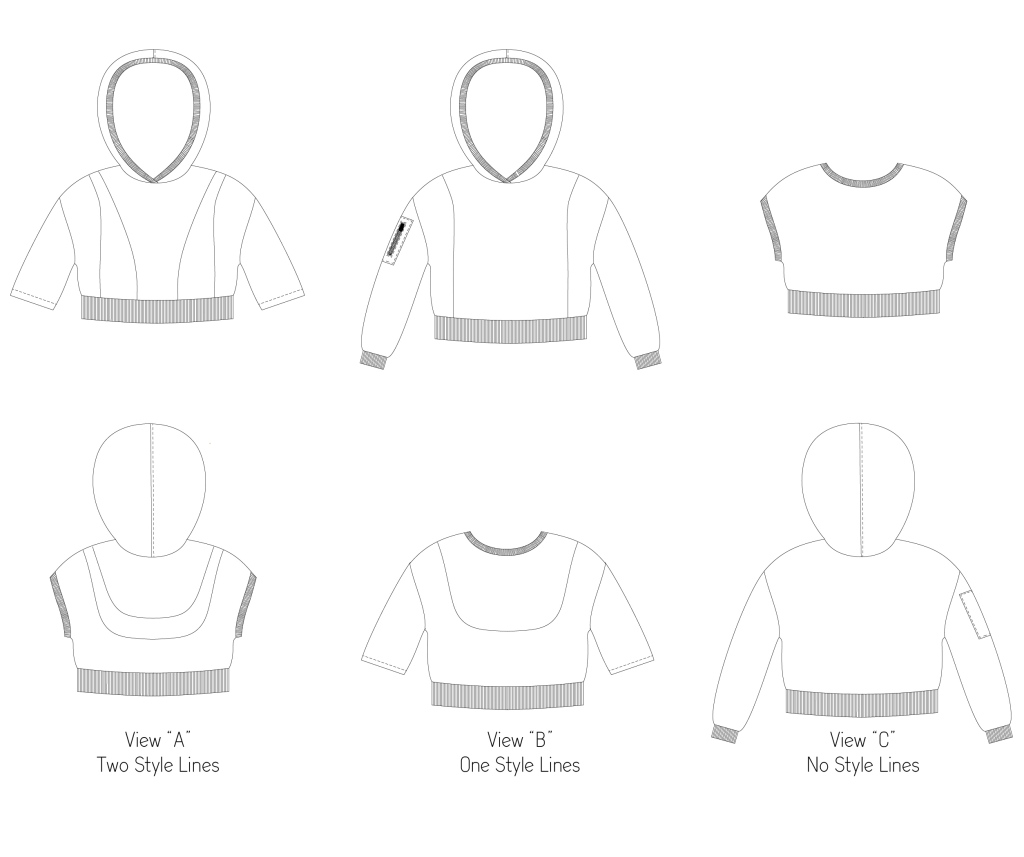
- curved piecing on the bodice in 3 different views

So, as per usual, here we go with a few of the things that came up during testing. Things that we feel you would want to know before heading into your Clover make.

First is the pocket. This is one of the more complicated features of the Clover pattern which bumped it up to an Intermediate level pattern. It features a welt zipper which requires time, precision and patience for a good looking final pocket. And, as always, the different knit fabrics all behave differently which means certain steps might involve more patience than others.
In the tutorial you'll find instructions to construct this pocket with bias sewn corners. It's my preferred method for nice corners, however, there is a quicker method that is suitable for those looking for something a bit easier and it may actually be preferable for some fabrics. Specifically the fabrics that have a lot of stretch or thickness. Some people will find that the corners are sharper with this method. So you're probably wondering why on earth I didn't choose this method for the tutorial! I'll get to that after I give you a few step pics here. These would follow after Step 9 in the tutorial.

At this point the zipper is installed and we're just finishing up with the raw edges. Starting with the long edges, fold over and press WST. Use the basted stitch lines as a guide.

Next, fold the short edges over in the same manner. Press along those basted stitch lines.

Turn the pocket with the right side facing up. Adjust and manipulate all the sides and corners as needed to create a nice rectangular shape and give a good press to hold the shape.

Now, this is reason why I don't prefer this method myself. It's just me being picky though. On the corners you will have the folded edges visible from the short ends you just folded under and pressed. I don't love those and by using the bias corner method from the tutorial, this isn't an issue. But it's also not the end of the world. Make sure that those raw edges are tucked properly underneath so they won't be visible on the finished pocket. You'll need to topstitch fairly close the edge when stitching the pocket to the sleeve. That traps those corners within the stitching and makes sure they won't poke out later.
And that's it. Super straight forward!

What else?... Trim in the seams! The tutorial gives suggestion for trim in the different seams on the Clover. But it's not included in the instructions so it's up for your own interpretation. My "heads up" on working with trim is to choose something that will sit nicely around those deepest corners on the back and to remember that those seams will get thick. Especially if you've chosen to add the lining and if you're using a plush fabric. It's your choice on whether or not to topstitch it in place and you might want to make that decision once you've pressed that seam and can see how it's laying.
The trim can be somewhat wide......

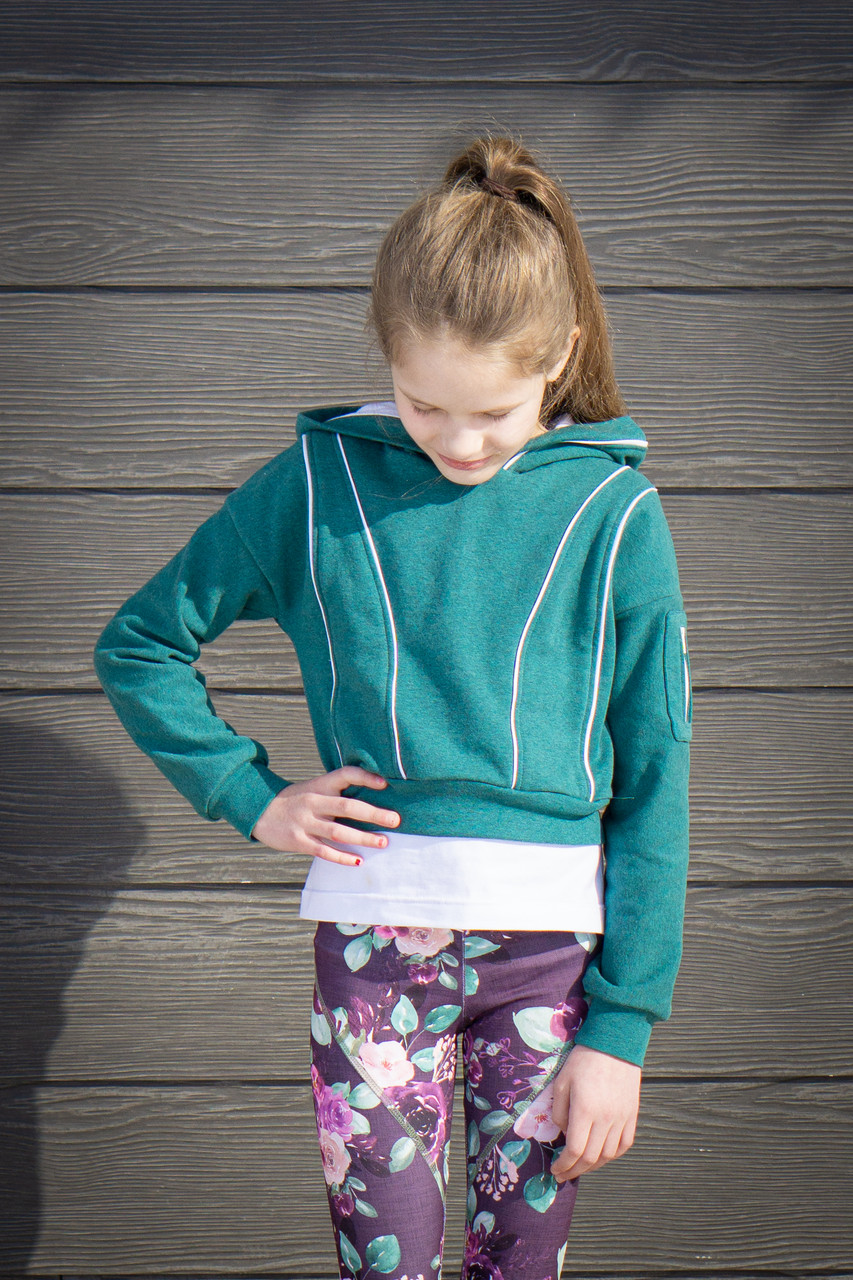
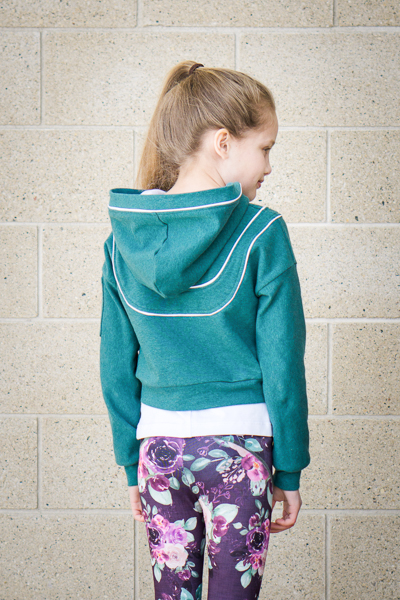
..... or another option is to keep the trim quite thin. (Yes, the thinner the trim, the more precise you should be.) On this gorgeous green Clover you can see how it accentuates all the style lines and for an extra pop it was added into the hood trim as well. To me this is a great sporty version so, of course, it looks great with the Tamarack Tights.
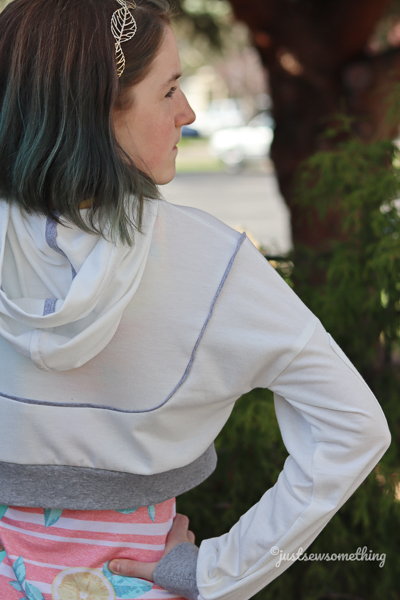
The mid-length sleeve is the only hemmed part of this pattern. All the other sleeves and hems are finished with a band. We found that this particular length seemed to look best without the cuff. You can have a bit of fun with textures by turning the fabric to the outside like this french terry version which gives a nice detail.

When choosing to add a hood, you have a few options. You can line it, bind the seams, or even just serge the edges and topstitch them in place.
Serging and topstitching will be your "quick and dirty" method. Next up for speed, but hiding all the raw edges would be the lining. I really prefer the lining option. The fabric suggestions for lining the hood is something very lightweight so it doesn't cause the hood to become so heavy that it pulls the whole top backwards. And I'd also recommend to choose the bodice lining so it helps balance out the added weight on the hood. This isn't available on all the views, so maybe just keep it in mind when choosing fabrics.

Binding the seams will take longer than the other two methods, but it's great for saving on fabric and it does give a nice detail.
One final note on the hood is to secure the SA around the back of the neckline with a bit of topstitching. Start at one shoulder seam, sew around the back, and end at the other shoulder seam. This will keep the seam from flipping out and I like stopping at the shoulders and keeping the front view clean without that line. The front doesn't flip out anyway. I did use a long straight stitch for this. Because it doesn't go all the way around, I still have stretch when pulling the top over the head. HOWEVER!!!!! If the person wearing this top has a larger head, (We find this more noticeable on the smallest sizes.) you might want to use a stretch stitch.
Of course, we love it when we see our patterns put together with other ones in the store. We've seen it with Tamarack, Railway, Tide and Moss. Here it is over the Cattail.

And my heart always fills up just a bit more when I see the "older" girls enjoying our patterns. It might be my imagination, but as time goes on, I think I'm seeing more of that age range starting to show up in our patterns. It feels like a dream come true.

I hope I haven't forgotten anything important and I hope this is helpful as you plan out your Clover makes. Releasing a new pattern still gives us all the feels and we love seeing your versions.