
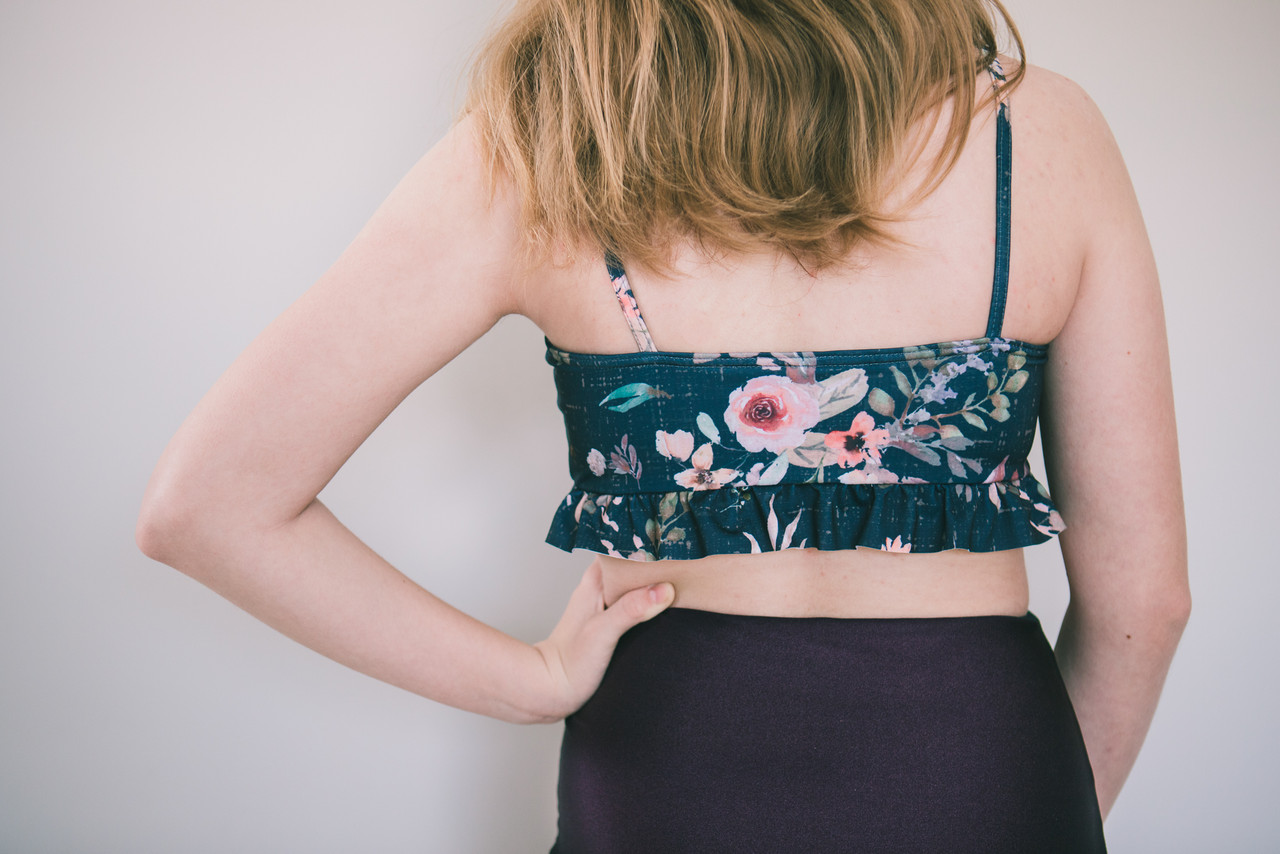
Something became clear to me as I recently worked on the Pike swimsuit - my girls are pretty much done with the girls' size chart and I better just accept that. As designers we aren't in a place yet where we're ready to add swim to the junior miss line and yet here I am with a kid who needs suits and is 2 sizes outside of the size range.
Now I have the benefit of using my software to draft her a pretend size 20 and not worry about whether or not it was tested well enough before using, but I wanted to also give you some tricks on how to do the same until the day that we get some junior miss swim.
For the next couple days (May 13-15) you can get Pike and Minnow back on release pricing using the code SIZEUP just in case this inspires someone who didn't grab one during release.
This trick I'll show you is what I've always done when my girls edged out of other company size charts as well so you can use this on a variety of patterns, but I want to caution you because it's doesn't always work just right.
The warnings:
- This works best for size charts that have even increments like our Sofiona charts do.
- However, I can't speak to other pattern companies and how well this works for all drafting methods. I have had some issues when trying this with certain companies.
- I don't recommend using this method to go up more than a couple sizes. Too far and you end up with the potential for weird fit issues that would normally have gone through the testing phase. In this case, you're the tester!
- Consider this simply a cheater method to make a pattern last just a bit longer, but you ARE going into untested territory and so you must always keep that in mind.
- Knit fabrics have a forgiving nature and even when I do see some things that could be tweaked, I still get a wearable garment. Woven patterns are trickier and should still be muslinned.
- Not a warning, but don't forget to make the necessary adjustments to all your elastics and cut chart pieces as well!!

Crop 2pc without the ruffle or piecing.
So let's jump in. First you need to locate the important corners or spots all around the pattern pieces. These are locations like the armscye connecting with the side seam, the waist, hip, or chest points, or deep curves like the leg openings or style lines. The corners are always the most important, but you can choose how many extra spots around the pattern that you want to mark. The more spots, the more accurate, and the easier it will be to connect and draw out your final new pattern pieces at the end.
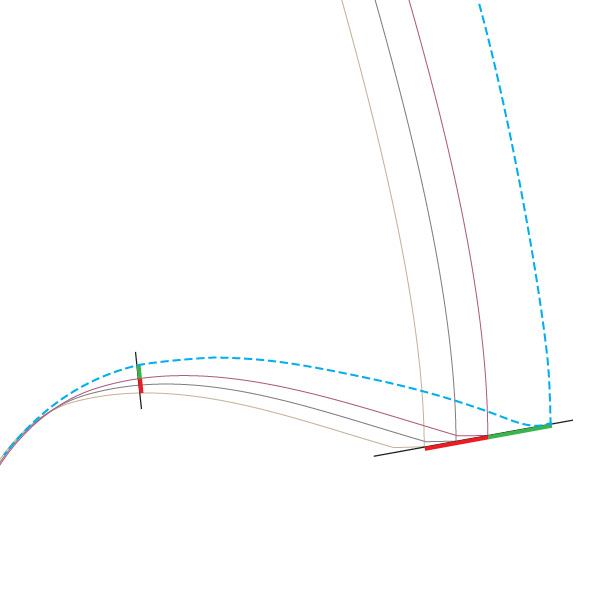
You going to draw a line through the last few sizes of each pattern piece at each of your marked locations and extend past the largest size about an inch. This first picture gives an example. Note that the lines are super straight and your extended section maintains the angle you need at each location.

The next thing to do is decide how many sizes you are wanting to add. Like I already mentioned, we don't recommend more than 2-3. This next picture shows where to measure for a single size increase. Along the lines that you drew, measure the distance between the last 2 sizes at each location. (This is the size 14 to the size 16 for Sofiona girls' chart.) The red line is where to measure. Measuring this section will let you know how much that "point" needs to increase to create the next size.

Here's an example of measuring for a TWO size increase. If you are adding two sizes, measure the distance along the line you drew between the last 3 sizes at each location. (This is the size 12 to the size 16 for Sofiona girls' chart.) Again, the red line shows where to measure.

To create your new unofficial size, you will take the measurement from the previous step and add that same distance to your original line extension. This will be the green line on the following picture. Mark the endpoint clearly and notice that your new point is along the correct angle.

Once you have all your major locations extended it's time to connect them. Try to follow the general shapes of the original pattern and the more locations you marked, the easier this will be. If the original uses a straight line, do the same. If it follows a curve, follow that same curve. See the blue dotted line in the picture below. Notice that the space between the size 16 and my new "size 20" is the same width as the space between the size 12 and 16. I added 2 sizes, so my gap should reflect those 2 sizes all the way up the line.
And there you have it! Do this for all the pattern pieces and then adjust your elastics and any cut chart pieces you may be using as well.
The only thing that I won't go into major details about here is the cases when you need to add one size at the waist, for example, and maybe 2 sizes at the hip. The least confusing method would be to add one size at a time and then blend sizes as you would in any other case. If you want to attempt to add the different amounts at different spots all at once, the same rules apply, but pay attention to what you are doing at each spot because it's easy to get tripped up and start drawing lines you didn't mean to draw.

I hope this was helpful. I know this made a difference for getting my oldest one more year of swimsuits from our Sofiona line-up. I've made her 2 Pike bottoms, 2 Pike cropped bodices, and a tankini bodice. I have a Minnow top almost completed on my sewing table that she can mix and match with these Pike bottoms (which she loves). She's good to go for another summer!